There are a number of factors that have to come together to make a great travel photo and by tweaking a few keys ones you can improve many of your pictures from the road in seconds. You don’t need professional software or a DSLR camera (although they help) to make your lackluster travel pictures a bit more vibrant and impressive to look at.
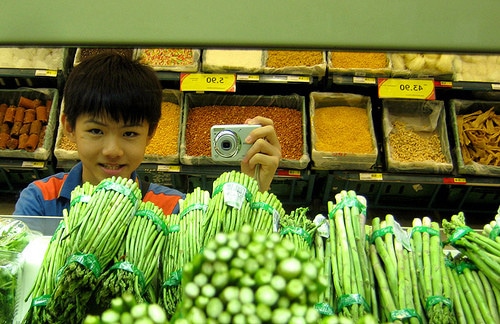
Your run-of-the-mill photo editor that comes bundled with Windows and Mac are all you need to recreate many of the visual tricks professionals use to breathe a bit of life into a stale picture.
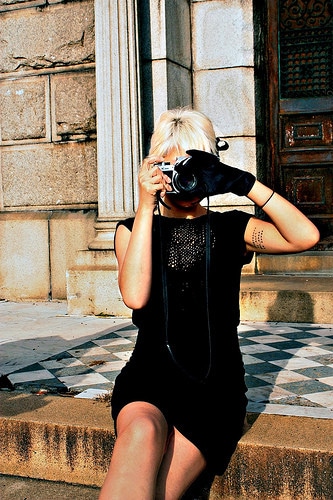 First Thing First – Getting The Shot
Sometimes you get home after taking a number of pictures that looked better on the back of your camera than they do on your computer screen. You can only spice up the pictures you’ve actually taken (sorry, woulda-coulda-shoulda doesn’t work) so it’s critical to get the shot when you have the opportunity.
- Take As Many Pictures From Various Angles As Possible – Changing your focus not only helps add variety to travel photos that tend to be repetitive, but also makes your travel pictures more interesting to look at while making you less obvious as well.
- Add A Buffer – There is no opposite of crop and you can’t add your mom’s feet back if they never make it to your memory card. Add a slight border and shoot a bit wider than you’re actually aiming for.
- Shoot Doubles – One of Johnny Vagabond‘s 5 simple travel photos tips is to take the same shot twice in rapid succession to get a slightly sharper image. Doing so reduces the amount your finger actually disturbs the camera when pulling the trigger.
- Remove Tourists – When you can’t wake up early enough to avoid the crowds, let technology get rid of them for you. Wired shows you how to remove tourists from travel photos and Tourist Remover does it for you; though they can help add perspective as Barbara notes.
Once you’ve taken your fair share, be sure to save your digital photos from corruption until you get a chance to properly backup and have a Plan B in the event your camera battery doesn’t last.
Make Your Pictures Pop With More Contrast
Practically all free photo editors, including those that come with your given operating system, have contrast sliders. Increasing the contrast, for most pictures, is going to be an improvement for dull photos.
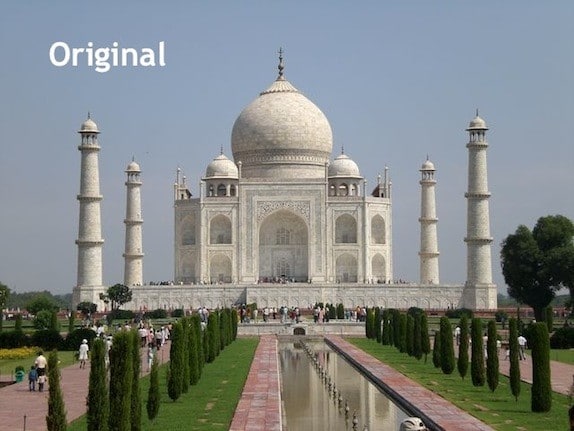
More contrast accentuates the darker areas of a photo bringing out shadows and the details along many edges. Contrast can also give depth to pictures of people, in particular faces.
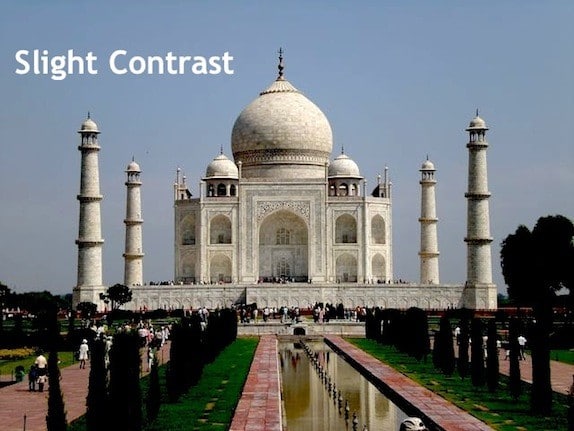
Be careful not to go overboard though as too much contrast will have your travel photos looking like pages from a comic book. (Which can be good or bad depending on what you want to achieve.)
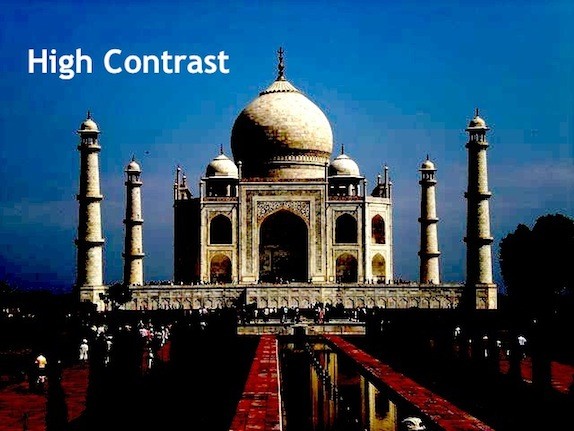
Increased contrast is one of the most used but often abused digital modifications done to travel photos. For a bit of spice use contrast sparingly, otherwise you’ll end up completely altering your pictures and turning them into abstract art.
 Exposing Exposure
Where contrast enhances the differences between various colors in a photograph, exposure increases brightness, slowly washing out details.
Photographic exposure is a fairly broad topic which you can easily simplify by increasing or decreasing exposure digitally and seeing the results. More tends to be better when used as opposed to less. – especially when combined with a bit of added contrast on monotone photos; the kind that tend to happen outdoors around noon or under cloudy skies.
Additional Basic Photo Adjustments For Some Spice
You can really go to extremes with travel photo tweaking, which is what tends to be the case with the first few pictures you get around to altering. These are a few more common settings which can be increased or decreased to add impact to bland shots.
- Color Saturation – You can increase how vibrant colors are across the board for a picture or choose to highlight a specific one, like blue for example.
- Black & White – One of the oldest, most common, and easiest to accomplish photo edits – as is adding going sepia.
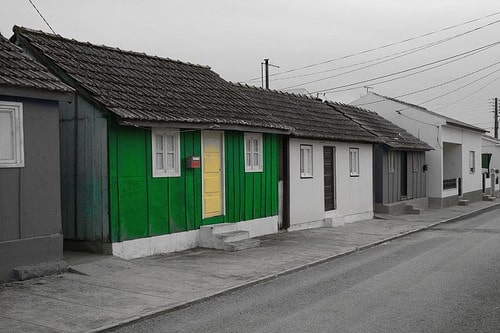
- Selective Coloring – Highlighting a single color in an otherwise black and white picture (like this Seattle photo by Nomadic Matt) can be achieved using the free online tool Picnik (here’s how).
- Sharpen – Most photo editors have this functionality but for a quick fix, free tool Resize.it can do it for you.
You can also remedy the post travel-blues by creating a photo collage as opposed to editing individual pictures using Shape Collage.
Confronting Photo Purity
Chances are, most of the travel pictures you’ve seen in magazines and on the Internet have been edited to highlight the best features of a given shot. For many, the thought of digitally modifying travel pictures after-the-fact violates some notion of sanctity. (Hey, what about black and white film?) Whether digital or film, photography is an altered version of reality and for most travelers these tweaks aren’t to convince yourself you’re a better photographer than you really are.
A bit of spice can bring out the best of your selected travel photos and even save you on souvenirs; especially if you stick to the free software.
[photos by: Gloson (picture of spices), Lady/Bird (woman taking picture), Fr Antnes (green house selective coloring)]


For me:
1. Take your camera everywhere when you’re on a trip. I can’t tell you how many great shots I’ve missed because, “Oh, I’m not going to see anything interesting tonight — I’ll just leave my camera in the hotel room.”
2. Take a ton of pictures. You don’t realize how many pics someone has taken to get that one great shot that you see in the magazine spread.
3. When you are editing, and playing with the contrast and exposure and such, leave it and then come back to it. I’ve made changes, thought they looked good, then came back the next day with fresh eyes and thought wow, does the color or light or saturation ever look terrible. If you look at a photo for too long you lose all sense of “normal”.
Nice post Anil.
I especially like the third piece of advice; photo editing is definitely a slippery slope and you can tweak, tweak, tweak until your photo looks like nothing at all if you’re not careful.
Nice post. Although I come from the land of Photoshop users, there are some great suggestions on resources here. And I don’t care what people try to say, nearly everyone edits photos to some degree! LOL
For those users who have DSLR, use RAW as it definitely makes editing easier. I have a high speed continuous setting on my DSLR and I use it all the time. My minimum is 3 shots — usually the one in the middle has the least camera shake. I am often shooting in conditions that do not allow for use of a tripod so that is even more crucial.
Now to get my actual travel blog back online and actually edit the 50K+ travel photos I have from the last couple of years. LOL
Once you’re done editing though you’ll have one heck of a good start for content on your travel blog! Thanks for the tips, just curious, what DSLR do you use?
I think I will be old enough to collect social security by the time I finish editing (I need to stop traveling so I don’t get further behind, but that’s no fun obviously!).
I use a Canon 7D – my “present” after our Canon 1000D died an untimely death (along with 2 laptops) during a boating accident in Belize Fall 2009. I’m on the hunt for some new lenses too, but my favorites are a super wide 10-22MM, telephoto zoom 28-300mm and the 90mm macro for foodie shots!
I love to hear what cameras and lenses people are using – gives me ideas for the future! Thanks for sharing 🙂 If I recall correctly, Sherry Ott uses a Canon as well and has just purchased some new lenses if you need some recommendations: http://ottsworld.com
Hi Anil!
Nice tips indeed! This are some of my beloved ones:
1. I like to shoot in “vibrant mode” (color saturation as you mentioned). Most point and shoot cameras have this setting. When you transfer a photo to the blog, its quality often reduces. In such cases, having a vibrant photo helps.
2. For macros (e.g. flowers), I set the camera to shoot 2 seconds after I’ve clicked. This, in addition to your continuous picture tip, helps avoid camera shake.
3. Use the fast shutter speed more (sports or action mode) more often than usual. This is a surefire way to ensure that there is no shake.
4. Select the right white balance – this setting is also available in most cameras… e.g. cloudy, sunny, snow, etc.
– Priyank
I always forget that my camera has a delay – which frustrates me every time I try and do some low-light photography! These are great additions; especially combating camera-shake, which isn’t something that comes to first consideration when taking photographs for most people.
Great stuff. I am just getting into the process of learning how to take and improve my photos. Only just discovered after many years, that the little flower is called Macro and its potential is great. Thanks for the links and recommendations on photo editing sites Anil. I end up using them quite often! LOL
I love macro mode as well and am especially a sucker for using it with flowers. The capabilities of even basic point and shoot cameras these days is pretty impressive.
Have fun with the new photo editing sites and let me know if you come across some other favorites 🙂
Happy New Years Anil!
Great tips for getting high quality shots. We usually take the same pictures about 3-5 times using different settings on the camera, this should be done with an SLR as well, and usually you get one that looks great. I there there is a lot of luck involved…sometimes more so that skill. This is especially true in my case, as I usually have no idea what I am doing!
Thank you Mike, Happy New Year to you! haha, love the comment about luck, so many times the pictures I take on a whim end up being my favorites and those I spend a lot time trying to compose…not so much.
The wonderful thing about digital vs. film is we have the luxury to take, take, and take many pictures 🙂
Good tips Anil. I use the self timer ALL the time for low light shots. It’s one of my favorite tricks. I also don’t buy into the whole ‘no process’ thing. I think most people that get all up in arms about it don’t really know what they are talking about. Since I started photography back in the film/darkroom days i can tell you everything is processed. I mean if you simply develop the film a bit longer or shorter – you’ve already changed things technically. The only difference is the computer makes it quicker and easier and your fingers don’t smell like chemicals. Which I guess sometimes I miss. 🙂
I don’t know why I’m such a timer-neglector! I need to break that habit in the new year…
As for processing, I agree to a large extent – but didn’t really think about it until black and white film was brought up to me in a conversation – an accepted form of highly processed pictures.
With regard to contrast (or brightness), it helps to understand that you should NEVER increase or decrease these settings across the board. Digital photos are composed of pixels. When you raise or lower the contrast, every single pixel is lowered or raised, which defeats the purpose. Most photo processing programs provide a levels adjustment, which produces a much better result. Instead of adjusting up or down across the board, it “reads” the range of contrast in the shot, sets the whitest pixels to pure white and the blackest to pure black, and then adjusts all the other pixels to the appropriate levels of black/midtone/white on a bell curve.
Thank you Barbara for the tip, I didn’t know about specific level adjustments but am now eager to play around with and see which of the OS built-in photo editors have this capability.
I’ve actually recently switched to taking all photos for my blog with my iPhone 3G. It’s one less thing to carry and I like having one less thing in my pocket!
I’m using BestCam to edit the photos and it does a bloody good job and is very easy to use.
Really enjoyed this post though, great information for an aspiring amateur photographer.
Where was I reading again that cell phones might replace digital point and shoots one day…!
These are great tips, particularly the multi-shot one: to which I’d add, if you’re a novice DLSR user experimenting with manual modes, consider multi shots with bracketed exposure….
As someone who’s grappling with Canon’s Digital Photo Professional at the moment — and just end up pushing all my RAWs to jpegs with only the odd bit of brightening — I find it kind of dispiriting to imagine everyone else tweaking and editing their shots, but maybe it is what everyone does nowadays (it’s, I guess, the equivalent of processing in the old days)… The contrast tip is a great one. Even better that you say not to over-do it.
Other good tips? Try and think in thirds. Consider the composition of the shot, the big lines, the shapes. Look for interesting light, patterns of light and shade, colours that zing. Don’t just think about what you’re shooting, but try and think of it as a visual composition, too.
Photo editing is pretty prevalent although I wish there were more sites showing how much a photographer edited a particular shot. I know that FOGG Odyssey had a series on his site like that and it’s interesting to see what specific things people decide to tweak in a given shot.
http://www.foggodyssey.com/
Thanks for the added tips as well!
the cheapest tool thats most effective is Iphoto some of the features are just as good as light room and comes free with any mac, a few simple tweeks can do wonders in this application,
also there are allot of great cheap affordable iphone apps on the market (some free) and can really be fun to play with and give a different impression on an aspect of a photo,
Instagram, Hipstamatic, camera plus, colorsplash, 360 are great iphone apps to name a few
I’ve never used iPhoto for photo tweaking before, thanks for the tip Dave, I’ll take a closer look at it. Easy to miss the versatility of the built-in Mac programs 🙂
I’ll look at the iPhone apps as well, are any of them free by any chance?
do try out iphoto, as a free come along with macs it doe get ignored but the Enhance button on many dark or useless photos can make such a large difference and its really easy to use for beginners its worth a play around. it is not as good as light room but much better price.
for the iphone apps, instagram is free and it has great social features, ps express is free, picplz free also. then for a low price of $0.99 colorsplash, really fun app, 360 great for panoramic shots, camera+ $0.99 (seasonal special) adds allot of advance features, $0.99 (another seasonal special) hipstamatic (app of the year) allows you to turn your camera into different types of camera to get different effect like wind ups and pop flashes really fun and you can get great results
Thank you very much for the detailed info Dave, I appreciate it!
no worrys, have you noticed Apple have slashed Aperture from £179.99 to £44.99 in the new Mac store today, bargain for that price, a more advance version of Iphoto if you want to up your game. worth every cent.
I’m still so late on checking out the new Apple store online…need to head over there now 🙂
I don’t have very much experience tweaking and editing my photos so a lot of these tips were new to me and really helpful. I’m definitely going to start experimenting more with adjusting the contrast. Also, thanks for the tip about selective coloring – I’ve always wondered how to do that! 😉
I think it’s one of my most favorite effects, it always looks so cool to see selective coloring. Glad these were helpful 🙂
I LOVE taking photos. I have absolutely no idea what I’m doing despite reading countless manuals and following photography blogs. If I really want a photo to turn out well, I take the same shot on a few different settings. Law of averages says one will look okay. 🙂 And then I use Picasa (super simple and free) to do any editing.
Julia
The best part about digital…gosh I feel old saying that!
Hi Anil! Clicked on your blog from Twitter 🙂 This is my first visit to your site and really enjoy it…especially this post. We’ll be traveling for 4-5 months this year (with our dog, Gus) and we’re trying to learn as much as possible on photography. We’ve bookmarked your “How to Travel With Pets” site!
Hi Lori, I’m glad you like what you’ve found! I’m looking forward to reading along on your road trip – have you posted the route anywhere? Couldn’t find one on your site 🙂
No, the itinerary isn’t posted yet…we’re still working on our schedule. We think the first leg (western U.S. and part of Canada) will take us about 45 days, and then we’ll take a quick break and head out again. I will definitely create a page soon. We have LOTS of planning to do!
Can’t wait! I’ll be in the US and Canada for a bit this summer as well and will look for recommendations from your trip 😉
Thanks for the tips! I’m always so upset when I get home and my pictures aren’t as good as I thought they’d be. I have yet to alter any of the photos on my blog yet, but maybe I should start taking the time to do this!
Granted not all pictures need it and often less is more when it comes to digital altering. Noticed one thing on your blog, the images are loading *very* slowly…the images are around 3MB each, I’d strongly recommend compressing them to help with loading time so people can see your vibrant photography 😉
My unsolicited advice:
http://travelblogadvice.com/technical/basic-ways-to-reduce-your-travel-blogs-loading-time/
Hope I’m not being too annoying but think it would help with the user experience.
Two more tips: using the fill-in flash to remove unwanted shadows and watching the background behind the subject will avoid surprises once you can’t take the picture again!
Another habit I should get into – I’m a habitual no-flash user!
Great post. It has made me take out some of my old photos and start to play around with them. Now that I am publishing them on my blog, I suppose I should really make them look a little…snazzier.
I like the use as needed approach 🙂 Any specific thing you think your photos are lacking?
Well, it is hard to take ‘bad’ pictures in Peru. But I don’t think any of them are exceptionally breathtaking or make people go ‘wow. I NEED to go there.” They are just mediocre. 🙁
I’ve been playing with the contrast tool a lot though, and that really bring them to life. Also, I’m trying to do some selective coloring on a series I took in a weaving workshop (all the yarn colors make this a lot of fun). But I am worried it will end up looking like I am trying too hard, you know? That it will be too obvious I am playing with the pictures and not letting the scene speak for itself. I’m probably over-thinking this.
I hear you – I like the as little as needed approach. Many photos don’t need to be edited so no need to put each one under a microscope.
You forgot to mention that once you start this process – it’s about impossible to stop. So plan on more time being added to the whole photography process! Taking more photos and multiples also means more time editing and sorting! 🙂
Ah yes, that is absolutely true! It must be where a lot of your time goes especially considering the amount of photos you take 🙂
I think almost all photos can benefit from your contrast adjustment tips. I feel like just a little bump up takes a “fog” off the picture.
It’s probably the tool I see most people using when it comes to general travel photos online. A dash can help many pictures, it’s true 🙂
I’ll add just one piece of advice that I think helps a ton…
Watch your horizon! Keeping the shot level sounds like such an easy concept but fixing tilted horizons can add a lot of unneeded time to your editing. It can also crop out some vital parts of the photo once you do adjust it. So make sure your horizons are level.
Thanks Thomas, one that (personally) has not come to mind actually…
Great blog and nice post, I think I’d add one thing though, before you start editing photos you should save an unaltered copy. Higher-end programs let you do this with a working file, but some free or low cost ones may not have that capability. Basically my reasoning being if you’re new to editing and end up not liking your results you have a backup copy so you haven’t lost anything. Once again really enjoyed the post!
Hi Joel, thanks and great reminder – I know I’ve made that mistake in the past!